The simple texturing is the basic method to map a texture onto an object. One texture unit is required
in the pixel shader. In GLSL, the access to the texture's texels (texel stands for texture element) is
done using the texture2D() function. This function takes as parameters the texture we
wish to access (a sampler2D) and the texture coordinates

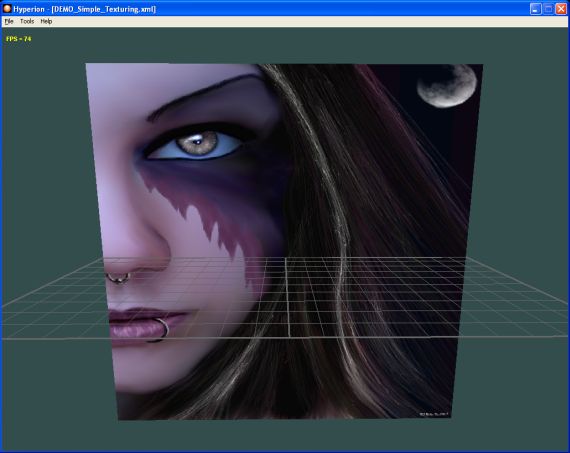
Fig. 1 - the DEMO_Simple_Texturing.xml demo
Texture coordinates being defined for each vertex, we have to retrieve them in the vertex shader in order to pass
them to the pixel shader. This data transmission between vertex and pixel processors is done using a built-in
varying variable (i.e you do not need to create it yourself). The variable that does the job is
gl_TexCoord. This variable is an array with as many entries as there are texture units you can access
in the pixel shader. The value of 16 is common for today's graphics boards: that means it is possible to use
up to 16 texture units in the pixel shader.
gl_MultiTexCoord0 is one of the vertex's standard attributes. Each vertex sent to the vertex processor
is defined by a set of attributes, of which a part is standard and the other is user-defined. Standard attributes
are the vertex's position, normal, color and texture coordinates. User-defined attributes are, for instance,
the tangent vector, commonly used for bump mapping. gl_MultiTexCoord0 is a 4D vector containing
the texture coordinates for the first texture unit (unit 0).
In GLSL, the coordinates of a 4D vector (vec4) can be written in different manners. If myVec
is a 4D vector, we can meet the following notations:
- myVec.xyzw
- myVec.rgba
- myVec.stpq
These different manners to write a 4D vector are there for the sake of code clarity and convention:
for a position we will use {xyzw}, {rgba} for a color and {stpq} for texture coordinates.
The following code, from the DEMO_Simple_Texturing.xml demo, shows the simpliest shader of
texturing:
[Vertex_Shader]

void main()
{
	gl_TexCoord[0] = gl_MultiTexCoord0;
	gl_Position = ftransform();
}

[Pixel_Shader]

uniform sampler2D colorMap;

void main (void)
{
	gl_FragColor = texture2D( colorMap, gl_TexCoord[0].st);
}
In this code, the colorMap variable is the texture that has been attached to the texture unit 0.
The following piece of code shows the OpenGL way to attach (or bind) a texture to the unit 0:
glActiveTextureARB( GL_TEXTURE0_ARB );
glBindTexture( GL_TEXTURE_2D, tex_id );

glTexImage2D(GL_TEXTURE_2D, 0, 3, width, height, 0, GL_RGB,
	GL_UNSIGNED_BYTE, (const GLvoid *)texData);
But before going further, let's have a look at the structure of a non-compressed texture in
graphics memory. In video memory, the texture is stored as an array of width x height texels
where width and height are respectively the width and the height in pixels of the 2D texture.
This array is accessible in X and Y. At the pixel shader level, the following code allows us to look up
the texel localized in X=0 and Y=0:
vec4 texel;
texel = texture2D( colorMap, vec2(0.0, 0.0) );
The distance along X and Y between a texel and the next one is given by the following relation:
texel_step_x = 1.0 / texture_width;
texel_step_y = 1.0 / texture_height;
Thus to fetch the texel localized in X=i (0≤i<texture_width) and Y=j
(0≤j<texture_height), the code becomes:
vec4 texel;
texel = texture2D( colorMap, vec2(i*texel_step_x, j*texel_step_y) );
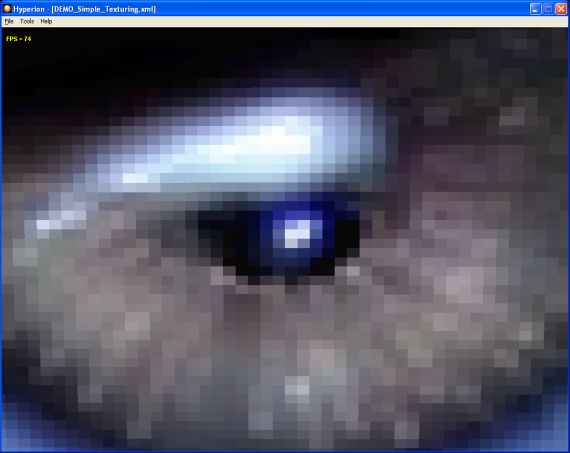
If texture filtering is not enabled (that is equivalent to the OpenGL GL_NEAREST constant),
the GPU performs, in the texture2D() function, a simple texture look up for using the texture
coordinates as array index. If we do a zoom in the image, we can see without problem the different texels
of the texture. Due to the zooming, each texel is stretched on several pixels on the screen:

Fig. 2 - the non-filtered texture - DEMO_Simple_Texturing.xml
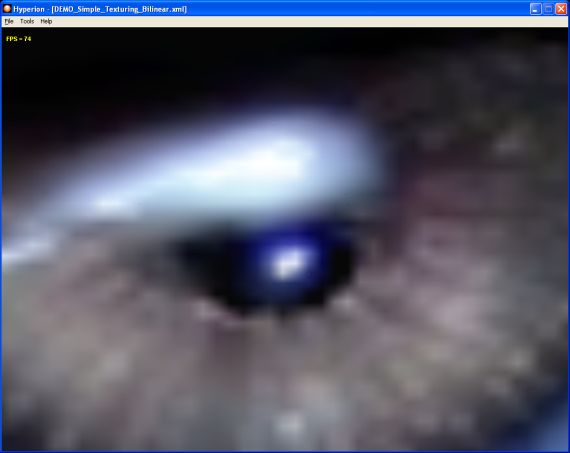
Of course, the usual technique to avoid this pixelization effect is to enable texture filtering.
In OpenGL, the filtering can be enabled by:
glTexParameterf(GL_TEXTURE_2D, GL_TEXTURE_MAG_FILTER, GL_LINEAR);
glTexParameterf(GL_TEXTURE_2D, GL_TEXTURE_MIN_FILTER, GL_LINEAR);
Thanks to these two lines of code, the GPU now performs a more complex operation under the hood
of texture2D(): bilinear filtering. But shader programming allowing us all kind of
crasy things, we can implement ourselves the bilinear filtering in order to see the work done by
the fixed pipeline.
The following function, found in a
nVidia paper
and originally coded in Cg, shows us one implementation of bilinear filtering:
[Pixel_Shader]

uniform sampler2D colorMap;

#define textureWidth 600.0
#define textureHeight 800.0
#define texel_size_x 1.0 / textureWidth
#define texel_size_y 1.0 / textureHeight

vec4 texture2D_bilinear( sampler2D tex, vec2 uv )
{
	vec2 f;

	f.x	= fract( uv.x * textureWidth );
	f.y	= fract( uv.y * textureHeight );

	vec4 t00 = texture2D( tex, uv + vec2( 0.0, 0.0 ));
	vec4 t10 = texture2D( tex, uv + vec2( texel_size_x, 0.0 ));
	vec4 tA = mix( t00, t10, f.x);

	vec4 t01 = texture2D( tex, uv + vec2( 0.0, texel_size_y ) );
	vec4 t11 = texture2D( tex, uv + vec2( texel_size_x, texel_size_y ) );
	vec4 tB = mix( t01, t11, f.x );

	return mix( tA, tB, f.y );
}

void main (void)
{
	gl_FragColor = texture2D_bilinear( colorMap, gl_TexCoord[0].st);
}
The use is really simple, since it is enough to replace texture2D by texture2D_bilinear in the
main() function of the pixel shader.

Fig. 3 - the filtered texture - DEMO_Simple_Texturing_Bilinear.xml