Warning: Undefined array key "HTTP_ACCEPT_LANGUAGE" in /home/clients/50536745d503cc9bd290722a231d5f8f/web/includes/o3_common.php on line 79

Deprecated: strpos(): Passing null to parameter #1 ($haystack) of type string is deprecated in /home/clients/50536745d503cc9bd290722a231d5f8f/web/includes/o3_common.php on line 79
oZone3D.Net Tutorials - Bump Mapping using GLSL - Normal Map - Tangent Space - Lighting


GeeXLab
Current version: 0.45.1
>GeeXLab homepage

FurMark
Current version: 1.30.0
>FurMark homepage

GPU Caps Viewer
Current version: 1.55.0.0
>GPU Caps Viewer homepage

GPU Shark
Current version: 0.26.0.0
>GPU Shark homepage


Blogs
>JeGX's HackLab

Geeks3D's Articles
>GPU Memory Speed Demystified

>Multi-Threading Programming Resources

>GeForce and Radeon OpenCL Overview

>How to Get your Multi-core CPU Busy at 100%

>How To Make a VGA Dummy Plug

>Night Vision Post Processing Filter

PhysX FluidMark
Current version: 1.5.4
>FluidMark homepage

TessMark
Current version: 0.3.0
>TessMark homepage

ShaderToyMark
Current version: 0.3.0
>ShaderToyMark homepage
>ShaderToyMark Scores

Demoniak3D
Current Version: 1.23.0
>Demoniak3D
>Download
>Libraries and Plugins
>Demos
>Online Help - Reference Guide
>Codes Samples
 
Bump Mapping using GLSL

By Jérôme 'JeGX' GUINOT
jegx [at] ozone3d [dot] net

Initial draft: November 4, 2005
Update: November 18, 2005
Update: March 8, 2006
Update: December 30, 2006


[ Index ]

Introduction | Page 2 | Page 3 | Page 4

�Next Page


1 - Introduction

2 - Lighting equations

3 - The tangent space

4 - The bump mapping shader

5 - Downloads


1 - Introduction

The bump mapping is one of the per pixel lighting techniques, which means that all the lighting calculations (application of the light equations) are calculated for each pixel. The power of the current graphics processors (or gpu) makes it possible to reach this precision while preserving acceptable frame rates.

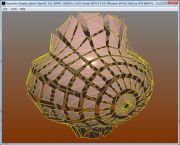
Indeed, the demonstration which accompanies this tutorial shows a sphere with a simple texturing rendering that features a per vertex lighting (torus_simple_mapping_test.xml) and the same sphere rendered with the bump mapping technique (torus_bump_mapping_test.xml). In the first case, the FPS is around 900 (usual rate on a development workstation, with a GF7800GT graphic controller) and in the second case, the FPS falls around 500 but with a much better rendering quality as shown on the following images:


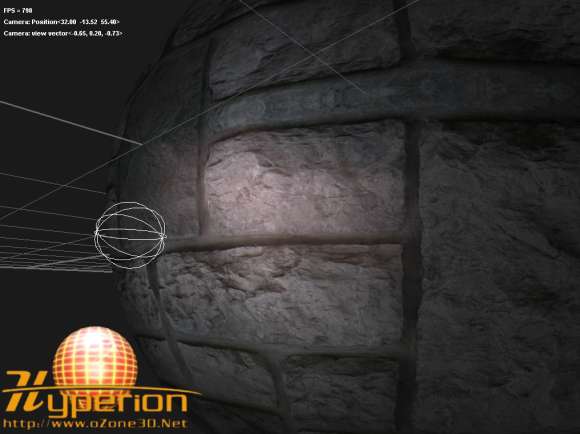
fig.1 - Simple texturing rendering with per vertex lighting.


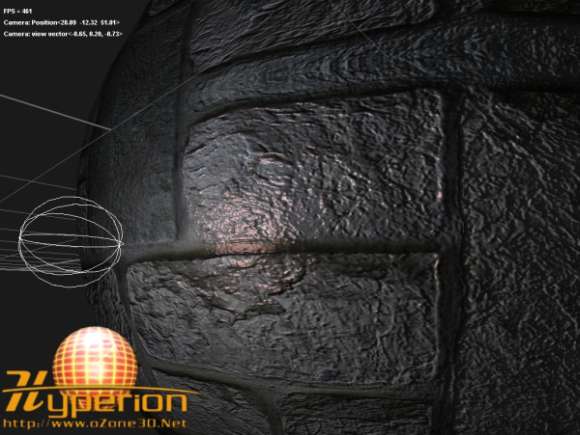
fig.2 - Bump mapping rendering with per pixel lighting.

But these differences between the performances are due to two major reasons: first, the bump mapping is basically a multitexturing technique. In our case, two textures are used for the bump effect. Accessing several textures is more penalizing than dealing with one texture. The second reason is that all the lighting calculations are made for each pixel.

Now, let us analyze the bump mapping technique. The main goal of the bump mapping is to simulate some relief on a flat geometry. That makes it possible to render at a lower CPU cost, objects that have a very detailed appearance. 
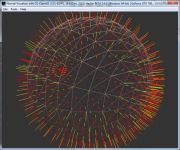
The bump mapping technique is very simple since it consists in using a normal vector that is deformed at the level of the pixel being processed. But before going further in the details of the code, it is first necessary to recall the light equations which we will implement.


[ Index ]

Introduction | Page 2 | Page 3 | Page 4

�Next Page


GeeXLab demos


GLSL - Mesh exploder


PhysX 3 cloth demo


Normal visualizer with GS


Compute Shaders test on Radeon


Raymarching in GLSL


Misc
>Texture DataPack #1
>Asus Silent Knight CPU Cooler
Page generated in 0.0029528141021729 seconds.