Ambient Occlusion Lighting
By J�r�me 'JeGX' GUINOT
jegx [at] ozone3d [dot] net
Initial draft: November 19, 2005
Last update: February 9, 2006
Translated from french by Samir Fitouri - soundcheck [at] ozone3d [dot] net

Prerequisite
1 - Introduction

Ambient Occlusion Lighting is a lighting technique which makes it possible to increase in a very appreciable manner the realism
of a 3D scene. It can be considered as a lower cost solution to imitate the total illumination techniques that are usually used in ray
tracing softwares.
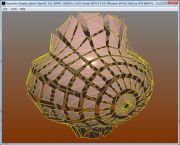
To arouse your interest, here is an example of a 3d real time rendering result that exploits the Ambient Occlusion, resulting
from the
Static Ambient Occlusion Lighting Demo
(called thereafter Static AO demo):

Fig.1 - Ambient Occlusion rendering.
The AO technique (AO for Ambient Occlusion) is mainly focused on the ambient term of the lighting equation used in real time calculations.
Here is the equation:
If = Ia + Id + Is
where
If is the intensity of the pixel final color,
Ia the intensity of the ambient color,
Id the intensity of the
diffuse color and
Is that of the specular color. For more details regarding the calculation of the Id and Is terms, please refer to
the
Bump Mapping . tutorial.
In this equation, the Ia term is constant for a given 3d object. That means that if the lighting equation is reduced to
If = Ia, the 3d
object will be colored in a uniform color and we won't be able to distinguish its 3d morphology. Figure 2 shows the scene of the Static
AO demonstration illuminated by a constant ambient intensity:
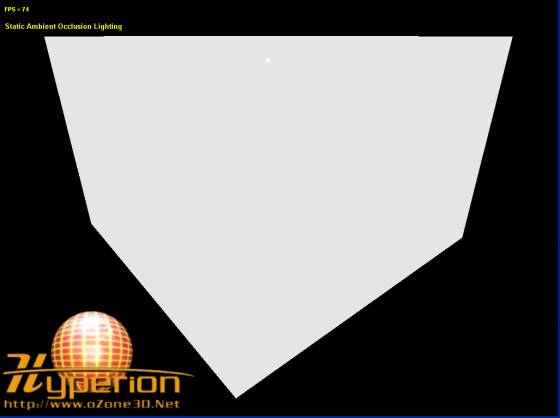
Fig.2 - Constant ambient intensity rendering.
We can't see a thing. By correctly modulating this ambient intensity (with the occlusion factor which we will explain further) we obtain
the result of figure 3:
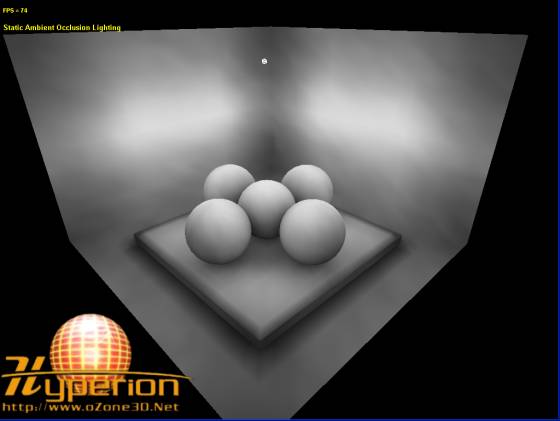
Fig.3 - Modulated ambient intensity rendering.
And now the 3d objects of the scene appear very clearly. Therefore, an illustrated explanation of the AO would say that it consists in applying
a variable modulation factor to the ambient intensity factor of the scene. That can be summarized by the following equation:
Ia = IA x occ(v)
where
Ia is the final ambient intensity,
IA the constant ambient intensity and occ() a function that depends on the
vertex which gives the modulation factor.
Let us now start giving a soul to the occ() function.
2 - The occlusion-map
Describing the occ() function with a strictly analytical method would be impossible (except perhaps for some very simple
cases (???)). The solution to the occ() function problem is very simple: we just need to store the occlusion data for each vertex in a
file named
occlusion-map.
Once this file is created, we have to load in each vertex the corresponding data which we can then easily get back in the AO vertex
shader. Well, dealing with vertex / pixel shaders is inevitable to implement sophisticated lighting techniques. But don't worry, the
AO shader that we will describe will be easily reusable in your Demoniak3D demonstrations (or others)!
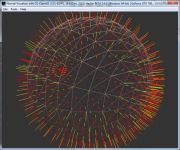
Let us see now the principle of occlusion-map creation as shown on figure 4:

Fig.4 - Calculation of the occlusion term.
The calculation of the occlusion data is rather simple: starting from the center of a polygon, rays are projected in all directions in the
higher hemisphere of the polygon. The occlusion factor (or term) which is the modulation factor previously considered, is defined as
the ratio between the number of rays that did not touch any other polygon and the total number of launched rays. For example, if among
100 launched rays, 70 do not have any intersection with the other polygons of the 3d object, then the occlusion factor is equal
to 70/100 = 0.7. The occlusion factor is a standardized value which lies between 0 and 1.
This process must be repeated for all the polygonal faces of the 3d model. Once the occlusion term for each face has been achieved,
a fast calculation (compared to launched rays) enables us to get the occlusion term for each vertex of the 3D model. It is this value
that will be stored in the occlusion-map.
Actually, significant information is stored in the occlusion-map: the
bent-vector. This vector is just the average vector of all the
launched radius vectors which did not intersect any face. Graphically, we can visualize this vector as being the central vector of
the
Non Occluded Area zone. This new average vector will replace the normal vector that is defined for each vertex in the
lighting calculations.
The main point of the Ambient Occlusion Lighting realism lies in the combined action of the occlusion factor and the bent-vector.
Update: February 9, 2006:
The algorithm in pseudo-code for the ambient occlusion calculation is given in
this topic
in the oZone3D.Net benchmarking forum.
To make things easier, I developed a little tool named
AOGen that aims only to create an occlusion-map starting from a 3D model.
The generated occlusion-map is a XML file and contains the bent-vector and the occlusion factor for each vertex of each 3d model's mesh.
This XML file is absolutely not related to Demoniak3D and can be used in any 3d application that can read XML files and occlusion data as well.
AOGen is downloadable here:
AOGen.
For the moment, AOGen works as a command line tool, but a new version featuring a graphic interface may quickly be developed if needed
by the users.
The creation of an occlusion-map with AOGen is done with the following syntax:
C:\>AOGen <model_file> <occlusion_map_file> <num_samples>
<max_collision_dist> <num_threads>
model_file is the 3d model to be preprocessed. AOGen makes it possible to load the same 3d models as Demoniak3D, which
are the * 3DS, * ASE, * OBJ, * FBX and * O3MDL file formats.
occlusion_map_file is the name to be given to the occlusion-map XML file.
num_samples is the number of rays to launch for each polygon. The greater is this number, the more accurate the occlusion data will be, and the longer the computing time will be! 128 samples seems to be a minimal value to get graphically acceptable results.
max_collision_dist makes it possible to exclude the polygons that are located too far away from the face being processed.
max_collision_dist is the maximum distance for a polygon to be taken into account in the intersection test. A value of 100.0 for
max_collision_dist gives quite good results (if 3D models are not too small!). In fact, num_samples and max_collision_dist are
dependent on the 3d model and must be empirically adjusted.
num_threads makes it possible to launch calculation on one or more threads.
AOGen is multithreaded and thus makes it possible to exploit at best the multi-cores architectures of the new processors.
The following table shows the computing times in seconds for processing the model of the Static AO demonstration, for 1 and 2
threads and this for two different workstations, the first equipped with a 3.6GHz P4 HT processor and the second with a 2.2GHz AMD X2
processor.
Pentium 4 3.6GHz HyperThreading
| Samples | 1 thread | 2 threads | Profit |
| 64 | 784 | 570 | 31% |
| 128 | 1457 | 1201 | 17% |
AMD Athlon X2 2.2GHz
| Samples | 1 thread | 2 threads | Profit |
| 64 | 620 | 332 | 46% |
| 128 | 1212 | 671 | 45% |
These tables tell us that AOGen fully expresses its potential on a true multi-core architecture like the AMD X2 processor.
Indeed, in this case, the speed gain is about 50% between 1 thread and 2 threads. With an architecture based on the HT (HyperThreading)
technology like that of the Pentium 4, the increase is about 25%.
The main problem of the current version of the AOGen utility is that it is too slow. Indeed it uses the bruteforcing for occlusion data
calculation. Therefore, when dealing with high polygon 3D models, the computing times can become huge. I will try to implement as
soon as possible a more advanced algorithm (based on the octrees or kd-trees) which would dramatically decrease the preprocessing time.
The following images show the importance of the number of rays (or samples numbers) for the accuracy of the occlusion data:

Fig.5 - 64 samples per face.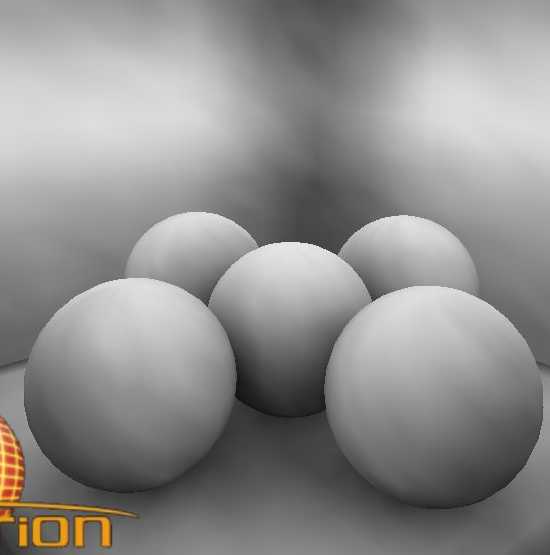
Fig.6 - 128 samples per face.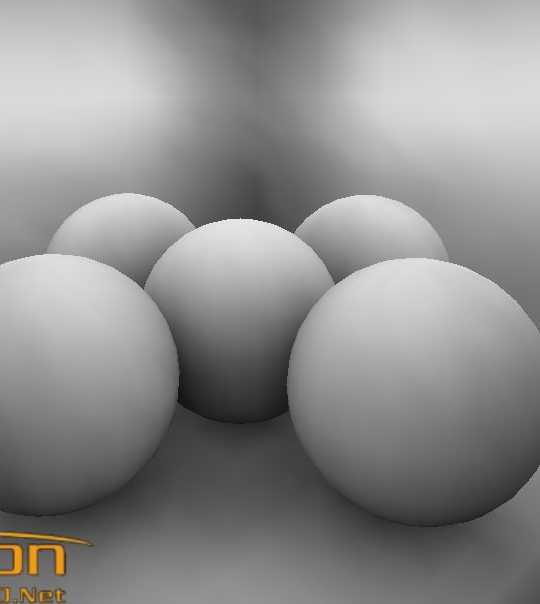
Fig.7 - 256 samples per face.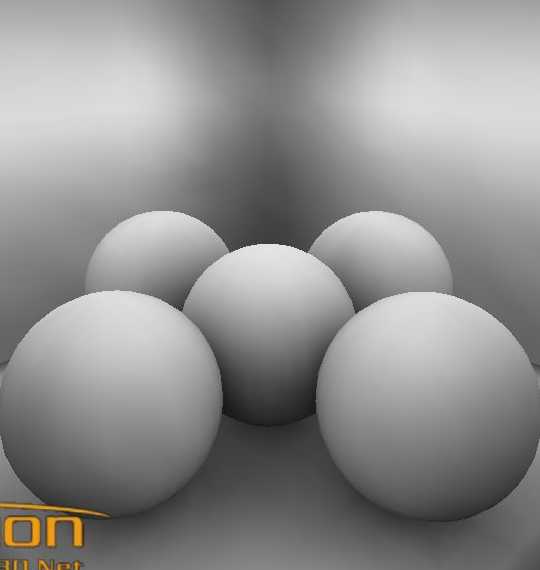
Fig.8 - 512 samples per face.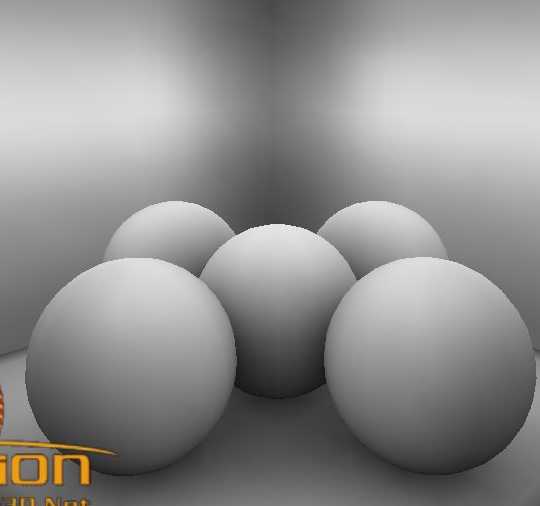
Fig.9 - 1024 samples per face. It is almost perfect!Thanks to Satyr for putting his AMD X2 workstation at my disposal for preprocessing the scene into 512 and 1024 samples. Th4nX!
The scene of figure 3 has been rendered with the GLSL (OpenGL Shading Language) shader according to:
[Vertex_Shader]

attribute vec4 ambient_occlusion;
varying float ambient_occlusion_term;

void main(void)
{
	gl_Position = ftransform();
	ambient_occlusion_term = ambient_occlusion.w;
}

[Pixel_Shader]

varying float ambient_occlusion_term;

void main (void)
{
	vec4 vAmbient = vec4(0.9, 0.9, 0.9, 1.0);
	vAmbient.rgb *= ambient_occlusion_term;
	gl_FragColor = vAmbient;
}
The occlusion data are stored at the level of each vertex as a vertex attribute. These vertex attributes are accessible in
GLSLthrough the attribute type variables. For each vertex, we thus get the occlusion data in the ambient_occlusion variable.
Theses occlusion data are a 4d vector. The x, y and z coordinates of the ambient_occlusion vector store the bent-vector, and the W
coordinate stores the occlusion factor. This occlusion factor is then used in pixel shader to modulate the ambient intensity.
In this shader, the bent-vector is not used.
This very simple shader does not have much utility except for this tutorial. For a real shader, I recommend you to have a look to the
one of the Static AO demonstration which implements Ambient Occlusion Lighting with textures and bump mapping.
In
Demoniak3D, it is important to clearly specify in which vertex attribute it is necessary to load the occlusion data. In fact,
in case of bump mapping for example, the vertex attribute 1 already stores the tangent vector. In that case, it will be necessary to load
the occlusion data in the next attribute, which is the attribute 2. The following piece of code shows the occlusion map loading in
the model of the Static AO demonstration. The scene is rendered in bump mapping:
<model 	name="temple" filename="data/scene_05.3DS" lighting="TRUE"
texturing="TRUE" use_vbo="TRUE" remove_seam="TRUE" >

    <position x="0.0" y="0.0" z="0.0" />

    <ambient_occlusion_lighting active="TRUE"
    ambient_occlusion_map="data/scene_05_128_samples.xml"
    vertex_attrib="2" />

    <loading_option  load_texture="TRUE" pixel_format="RGB_BYTE"
    compute_tangent_space_vectors="TRUE" auto_gen_mipmaps="TRUE" />

</model>
The XML
vertex_attrib attribute of the
ambient_occlusion_lighting element enables us to specify in which vertex
attribute to load the occlusion data.
The technique presented in this tutorial is described as static (Static Ambient Occlusion Lighting) because the occlusion data for
a model are once and for all calculated in an offline process. The 3d model should not undergo any transformations or deformations,
otherwise the occlusion data will lose their significance. This type of ambient occlusion is perfectly adapted for the static 3d
models such as houses indoors, constructions or arts (statues for example).